
Initial Setup
Required items:
Manual treadmill
Magnets
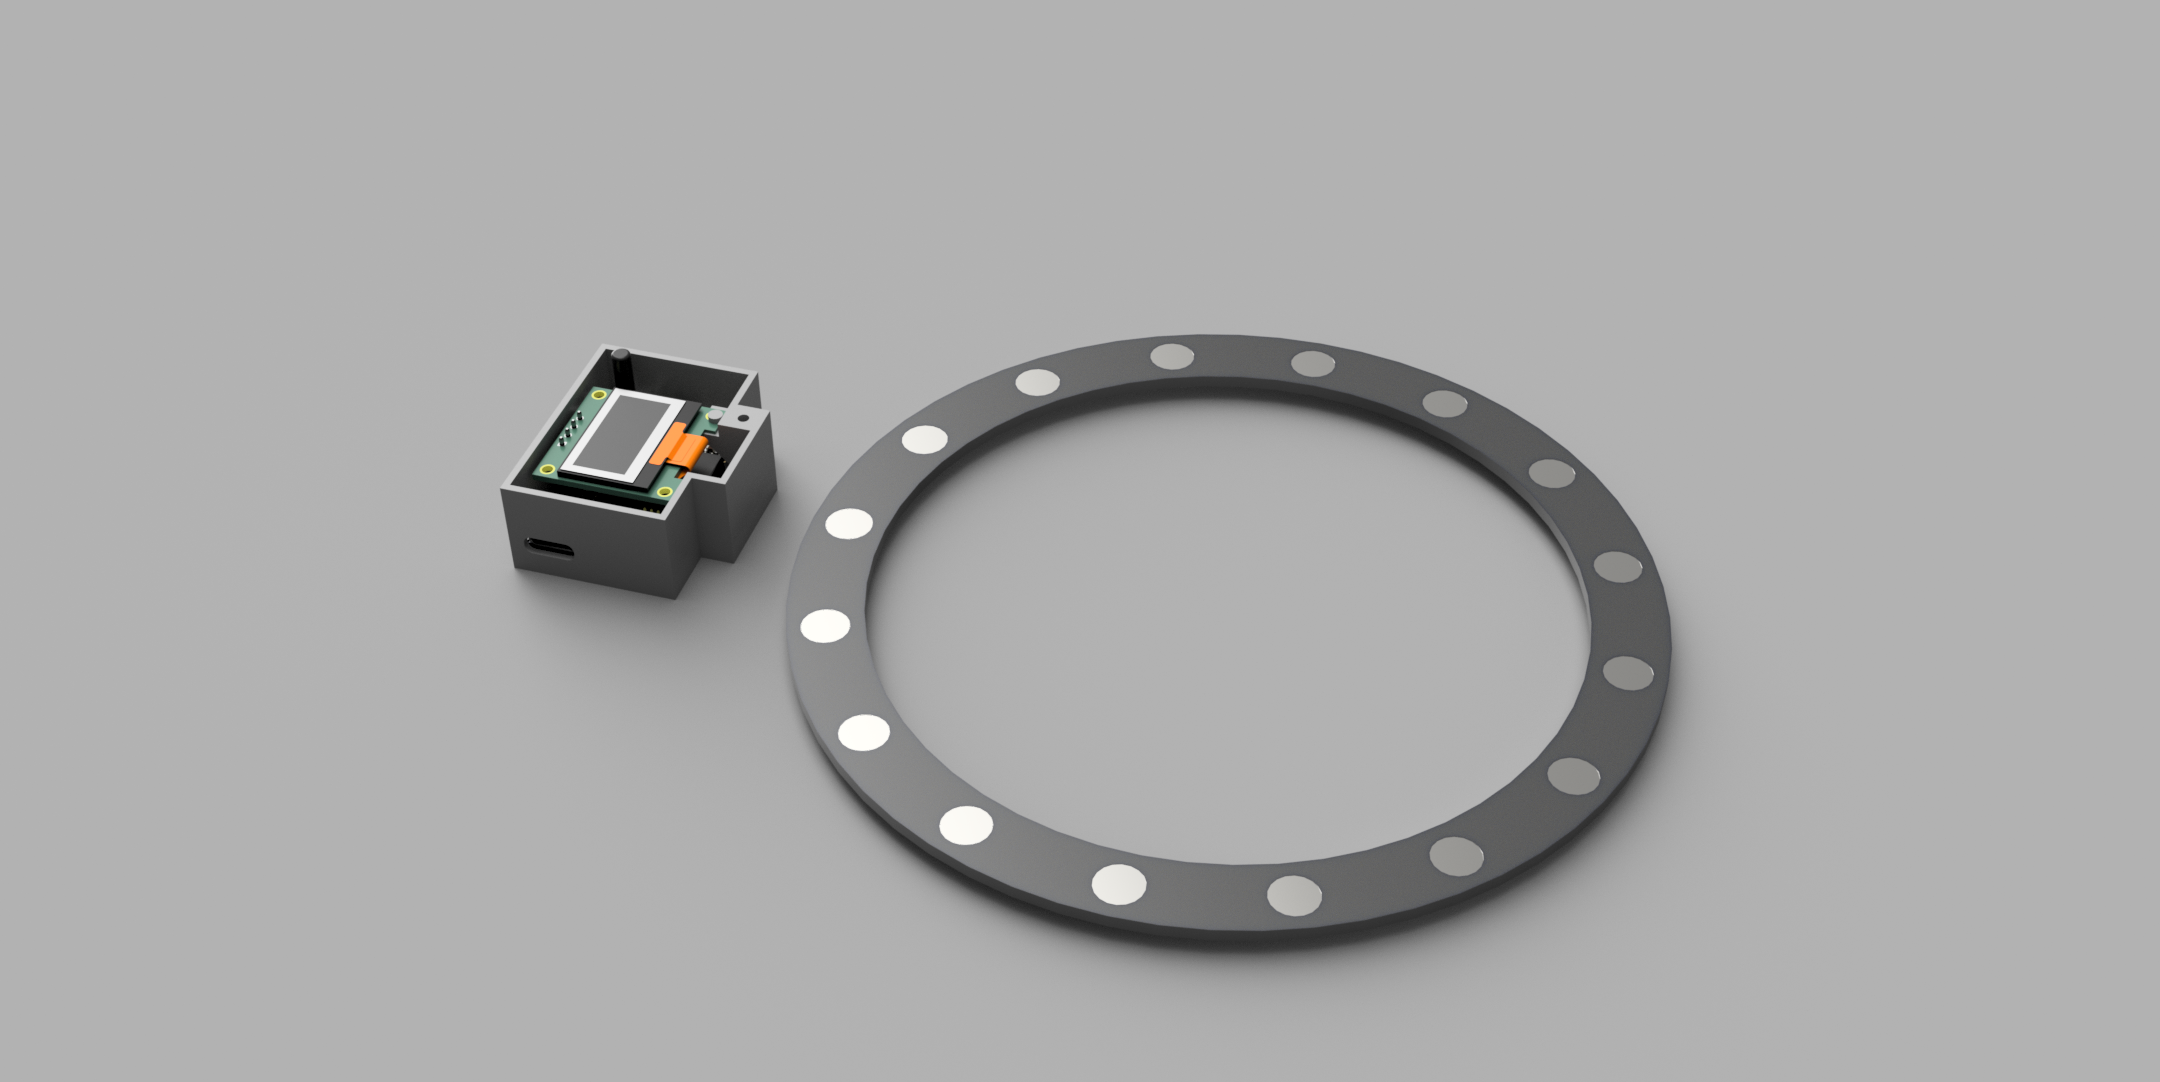
Magnet ring
Reality Runner Treadmill Sensor
Treadmill Compatibility
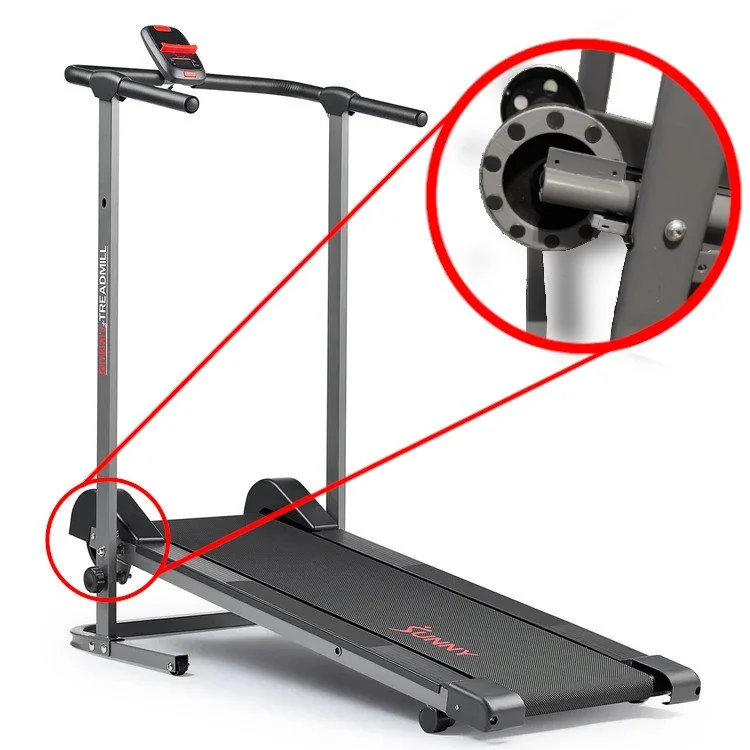
Before beginning this setup guide, make sure you have a compatible treadmill and a magnet ring. The image on the right shows a manual treadmill with a flywheel attached to the belt shaft.
A compatible magnet ring can be purchased through our shop, or you may make your own! The magnet rings from our shop are shipped in two halves, so they can be easily installed without any tools - just glue!
When ordering your magnet ring from our shop, measure the outer diameter of your flywheel. You will be asked for this measurement at checkout.
Video Walkthrough
Magnet Ring
Reality Runner V2 uses a special hall effect sensor in order to support reverse movement. Reverse movement is only compatible with magnet rings that have an even number of magnets at alternating polarities (i.e. every other magnet is backwards).
To confirm your magnet ring is assembled correctly and your Reality Runner is positioned properly, view the LEDs on the device as the ring spins. Rotate the wheel slowly, and see how the LEDs react to each magnet. Make sure the LEDs react to each magnet in your ring.
Reality Runner V2 users should see the green and red LEDs flash, one for each magnet polarity. As you spin the wheel slowly, make sure the LEDs flash green, then red, green, then red, etc.
Reality Runner V1 users will only see one LED flash, as it only supports one magnet polarity (all magnets facing the same direction).
Skip the magnet setup by purchasing a magnet ring through our shop!
Treadmill Assembly
Assembly should only take about 5 minutes. Your Reality Runner will arrive with mounting tape, and ring orders from our shop include super glue.
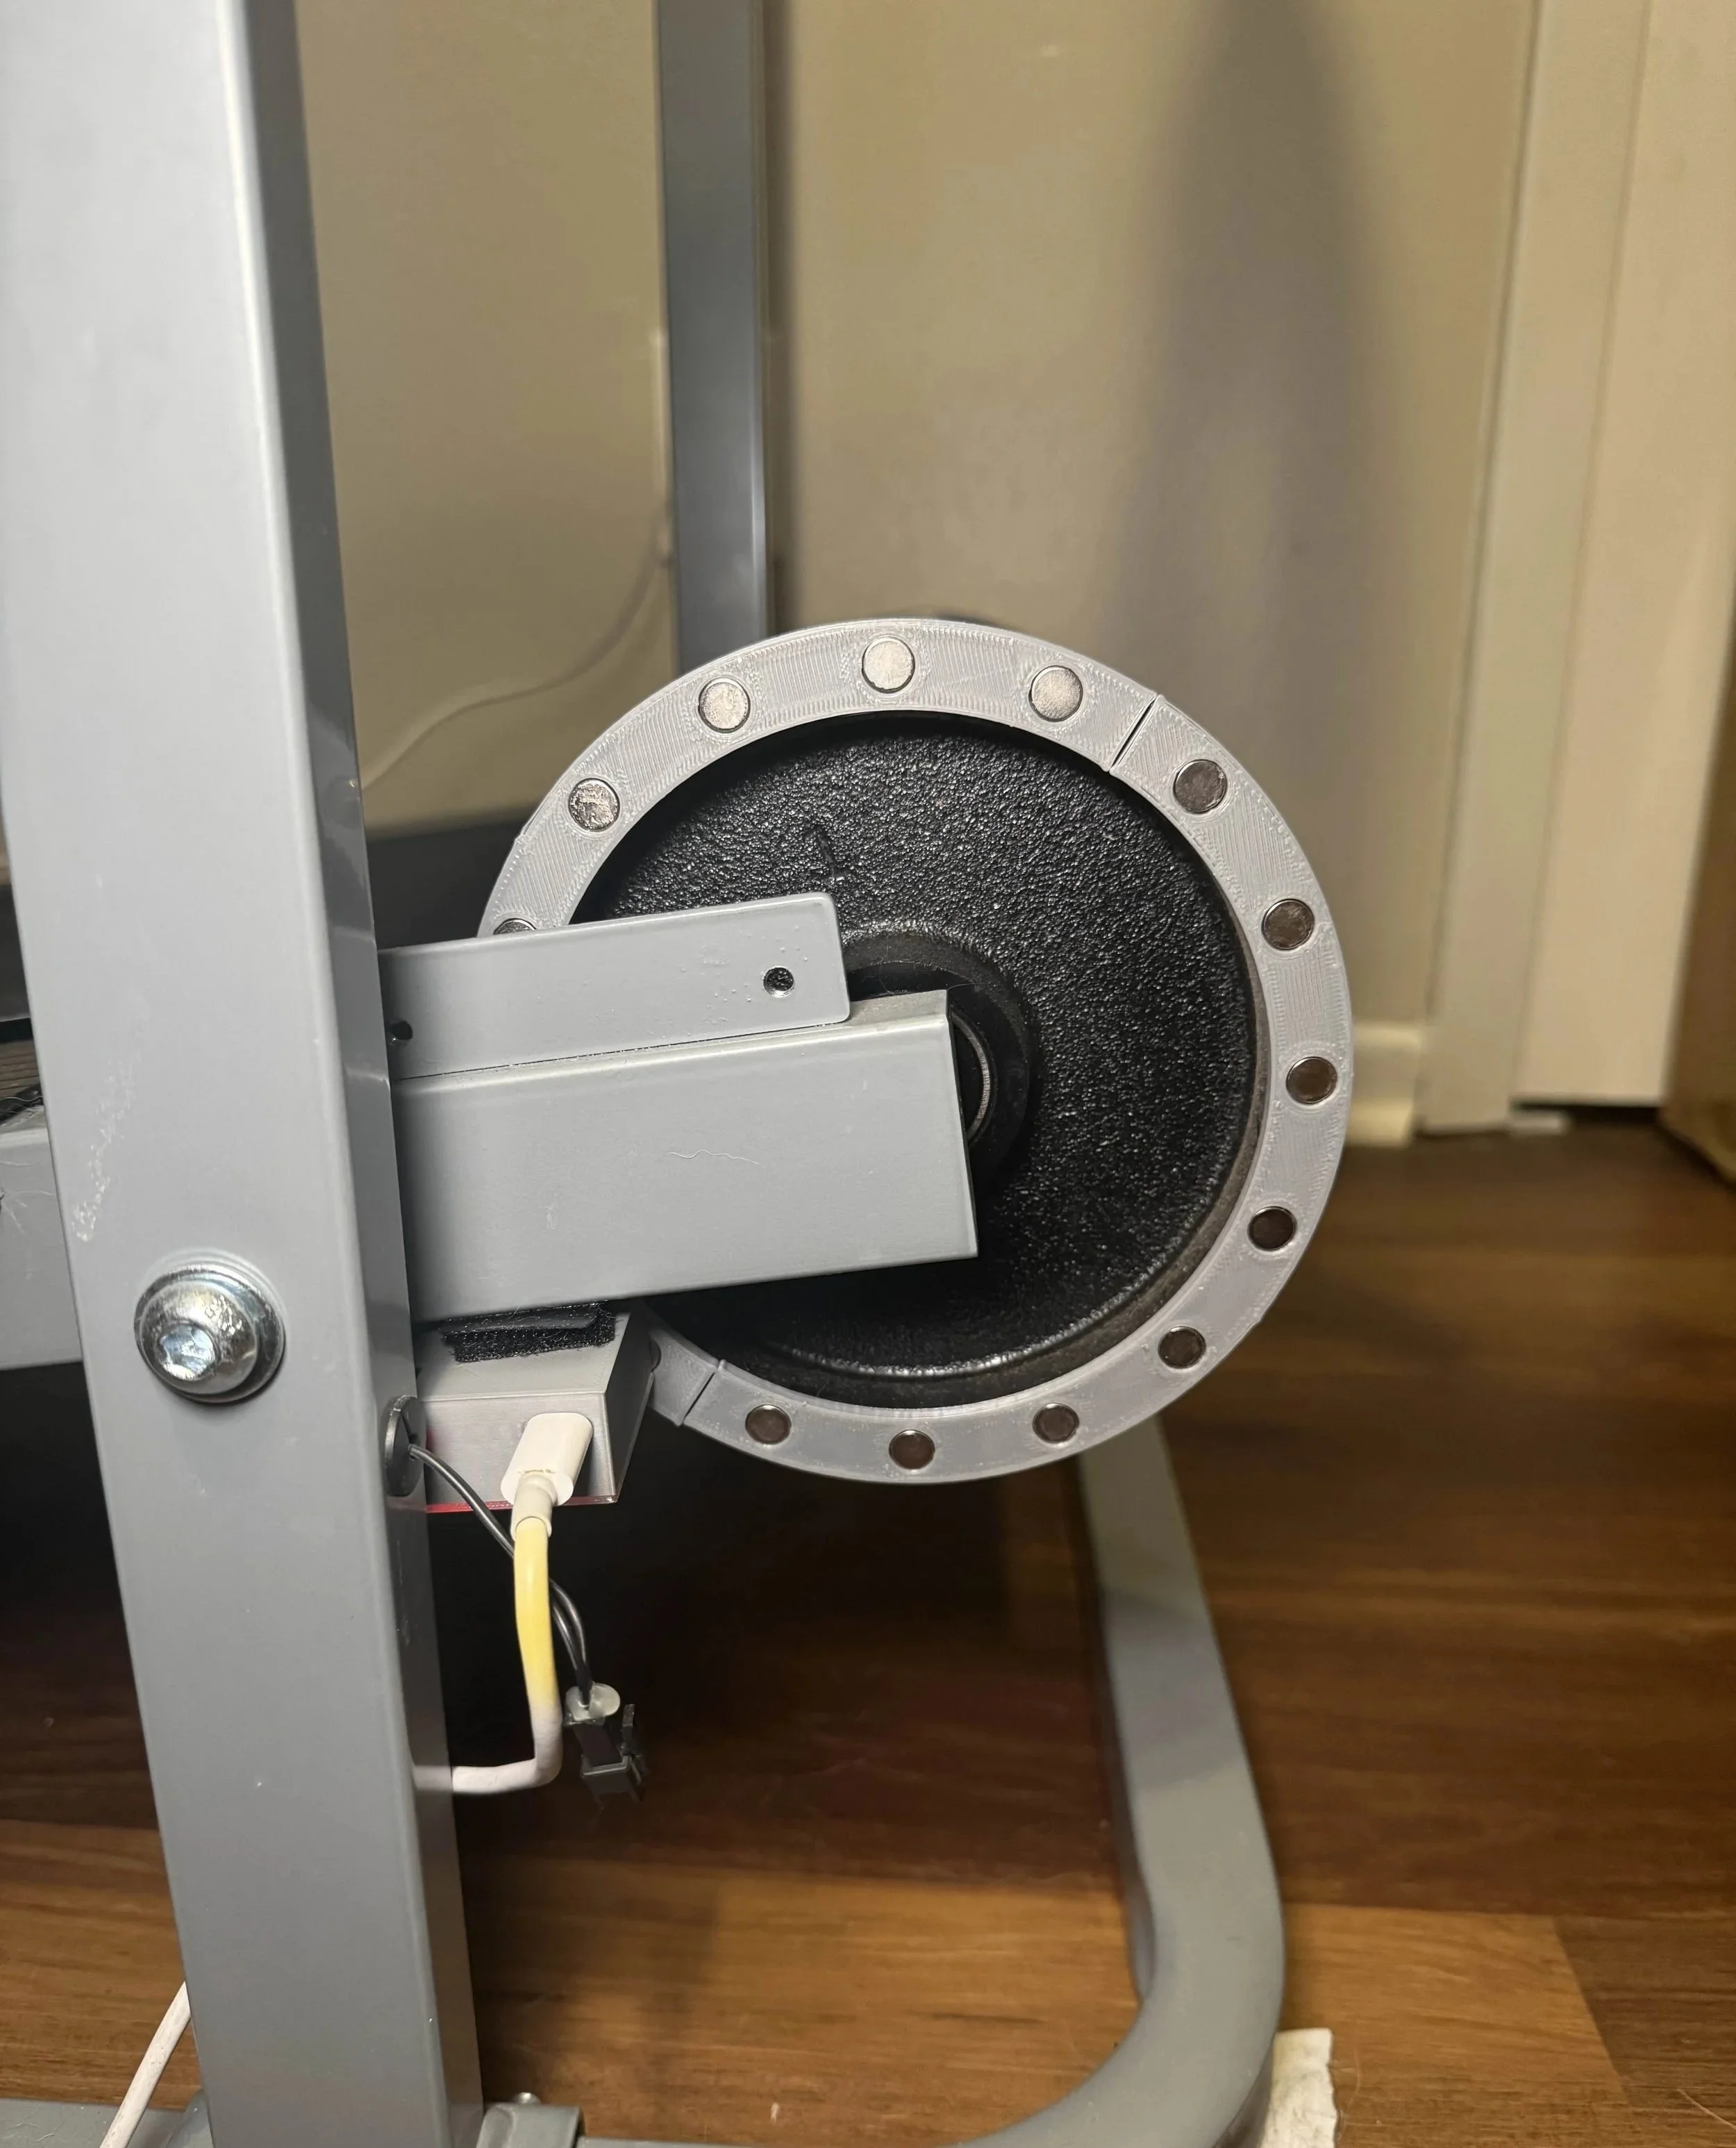
Glue the magnet ring to the treadmill flywheel, and align each half into a circle as best you can.
Attach your Reality Runner to the treadmill using the included mounting tape and align it to the magnets. Reality Runner V2 has an arrow on the case to help you align. LEDs will blink when a magnet is detected.
Connect the sensor to a power source. A power bank, wall outlet, or even PC USB port will suffice.
That’s it!
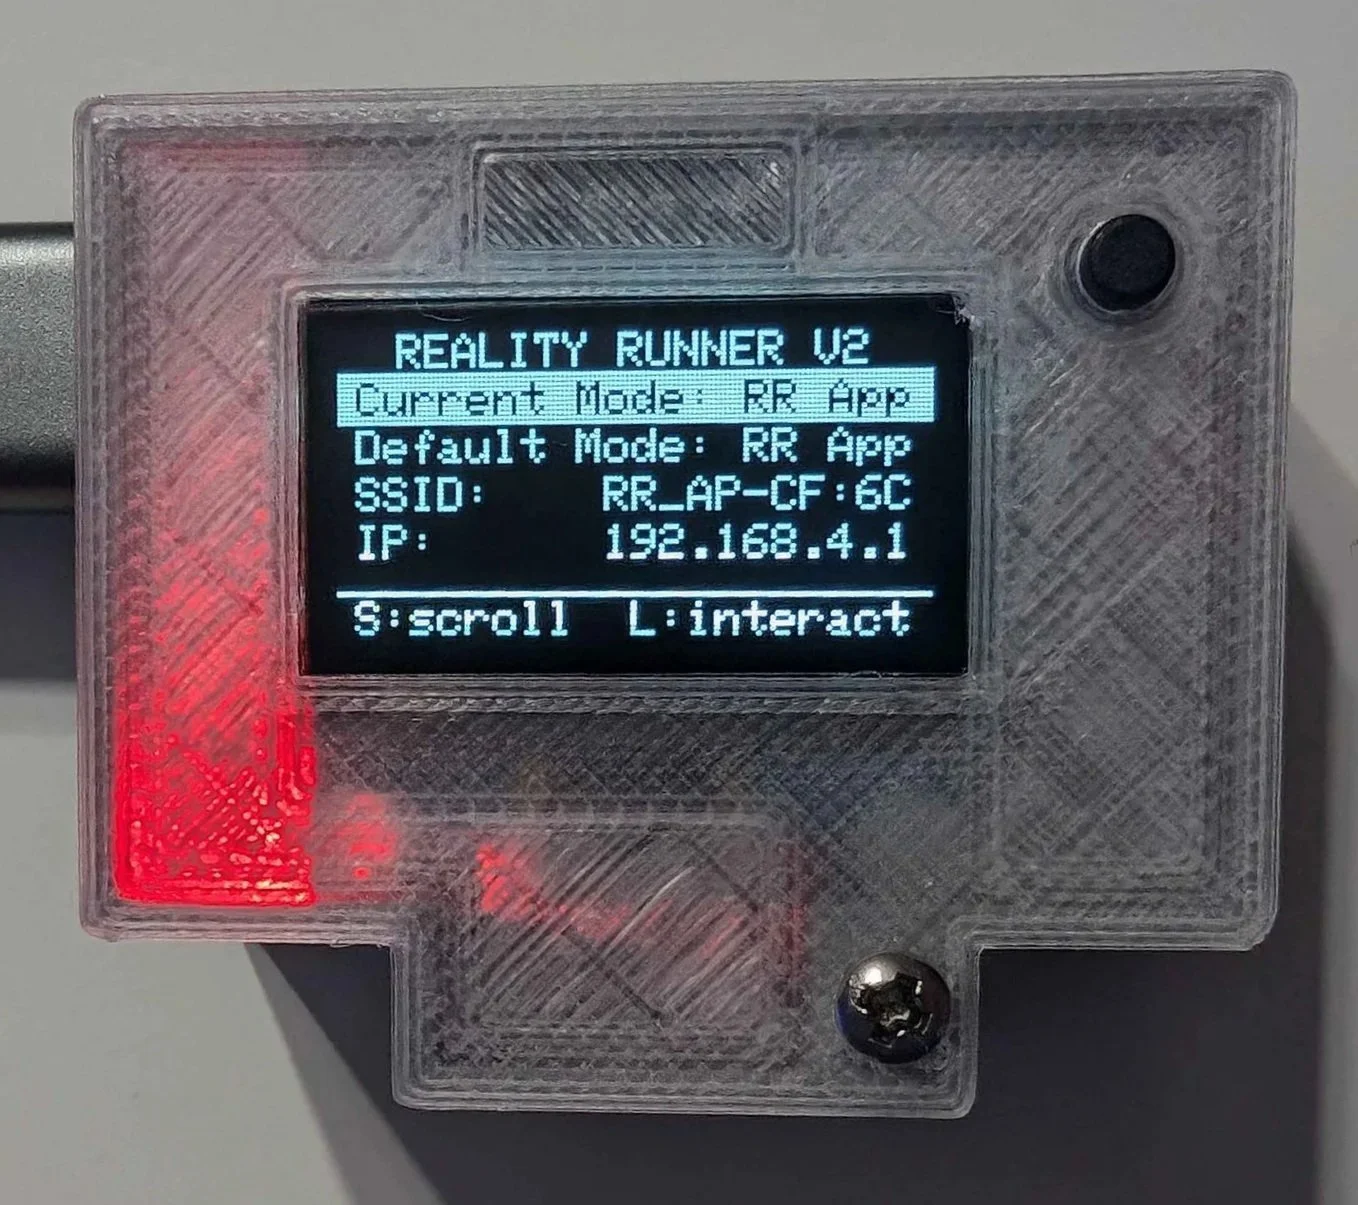
Reality Runner V2 OLED screen
Reality Runner V2 includes an OLED screen for easier setup and system information. The button on the device can be used to navigate this screen, a short press scrolls and a long press interacts.
The OLED screen allows you to:
Choose between emulating an XINPUT controller, or communicating with our desktop app (learn more here).
See the current Wi-Fi network your sensor is connected to, and the IP address the Web UI can be reached at.
Change the Wi-Fi connection between the on-device Hotspot. or your home network (use the WebUI to enter your Wi-Fi credentials)
View your sensor’s firmware version
Factory reset all of your settings
View system errors
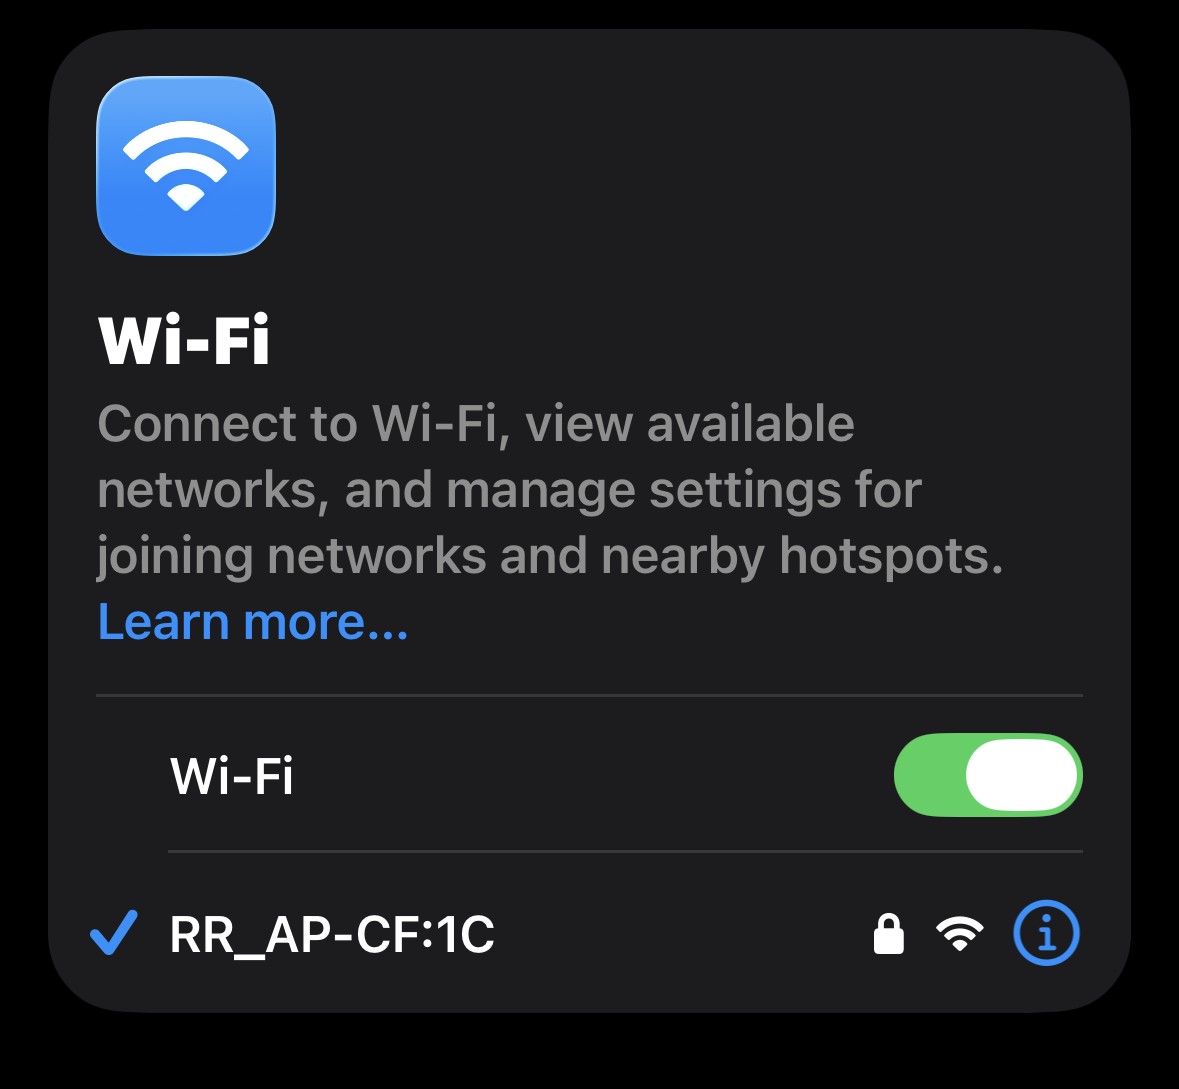
Connecting to the Sensor
In order to access the Web UI, your device needs to be connected to the same Wi-Fi network as the sensor. Out of the box, the sensor will create a Wi-Fi access point you can connect to. In the next step, you will be able to connect it to your home WiFi network. For now, connect to the sensor’s Wi-Fi Hotspot with the following credentials:
SSID: RealityRunnerAP-##:## or RR_AP_##:##
Password: RoadRunner
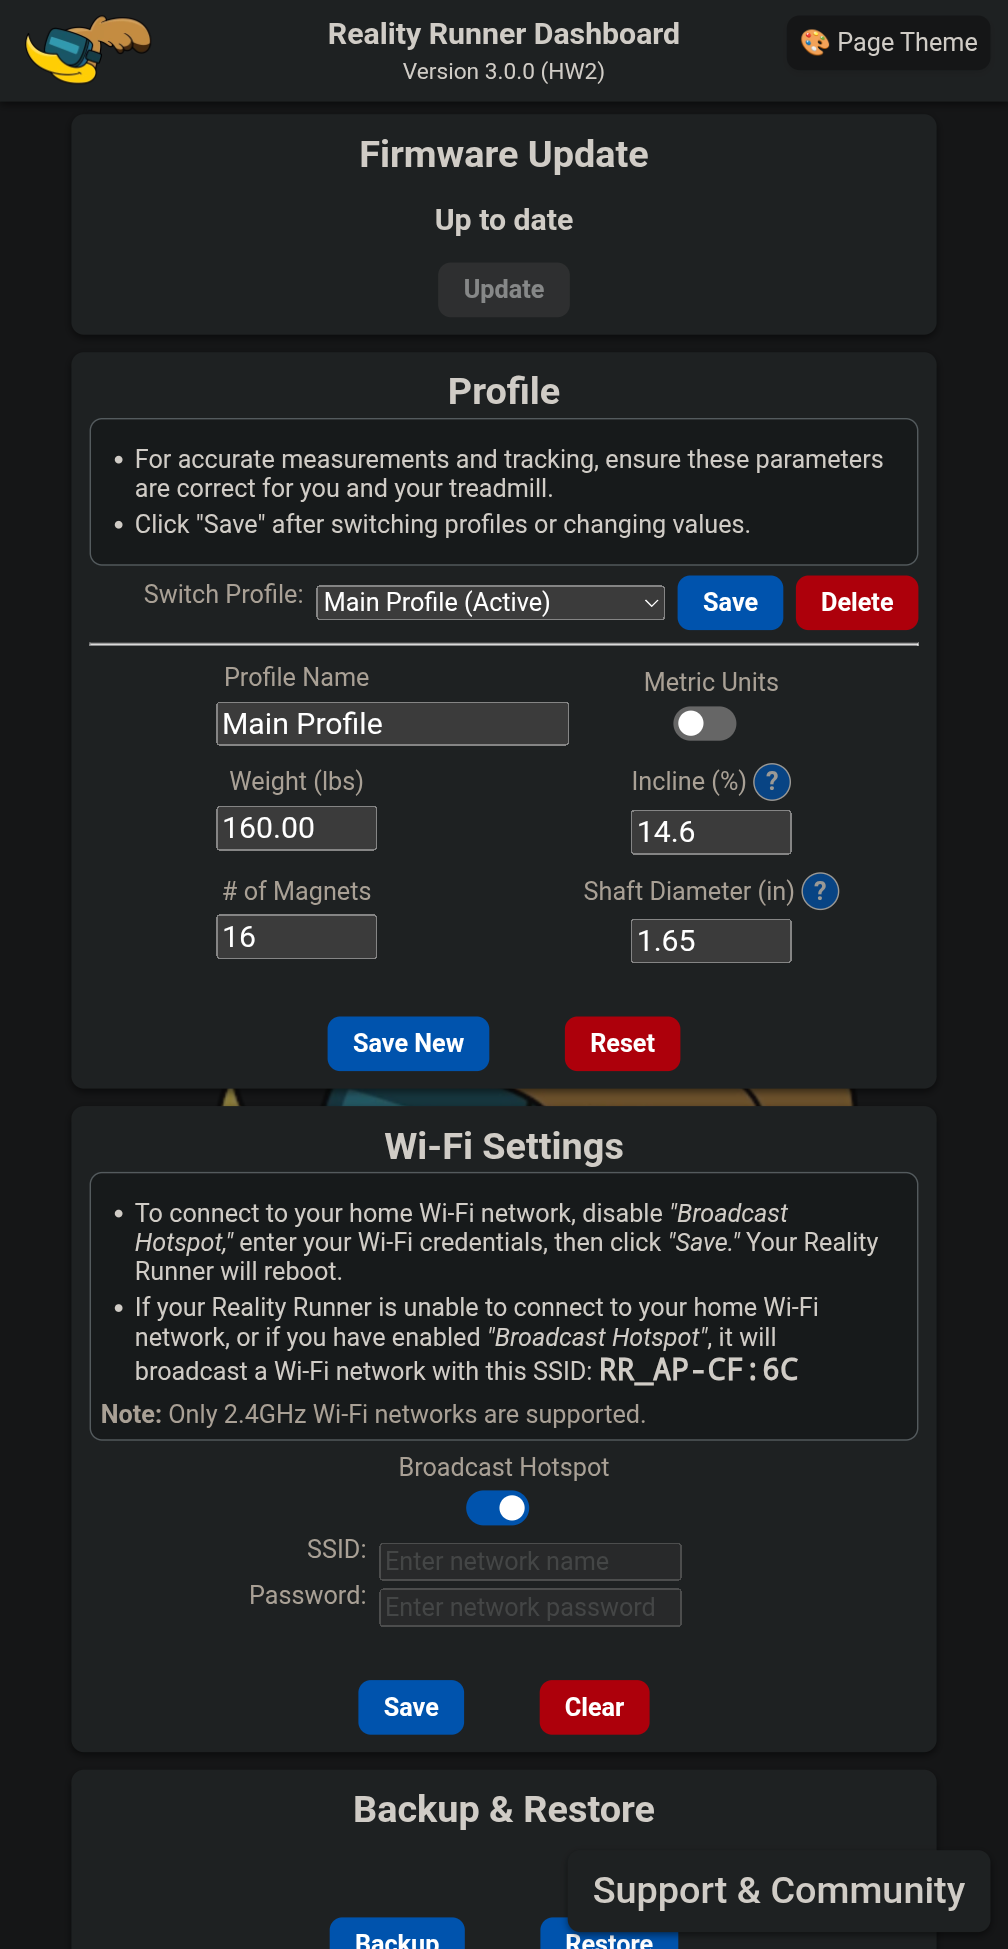
After connecting to the Hotspot, open a browser and navigate to:
192.168.4.1
If you want your Reality Runner to connect to your home Wi-Fi network, visit the Wi-Fi Settings card. Turn off “Broadcast Hotspot,” enter your network credentials, then click Save.
Using your home Wi-Fi provides a much more stable connection, and allows you to receive Over-The-Air firmware updates.
When using your own Wi-Fi network, the calibration page can be reached through the browser at:
Some home routers do not support this .local address. If it’s not loading, find your Reality Runner’s IP address from its OLED screen. Then, visit that IP address in your web browser.
Note: The Reality Runner will only connect to 2.4GHz Wi-Fi networks. 5GHz Wi-Fi networks are not supported. Dual-band Wi-Fi networks broadcasting both 2.4GHz and 5GHz should work. Connection to a Wi-Fi network is not required for our Desktop App to function.
